Steps to Create Windows Service
What is Windows Service?
Windows service is a computer program that enables you to
create and run executable applications as a background process.
Its start status can be made as manual or automatic, in
automatic the services will start automatically as soon as computer boots.
It is very easy to install the windows service, all we need
to do is just simply run the Utility program called “InstallUtil.exe” providing
the path for the service executable file which we will see how to create.
In this demo we will create a windows service which executes
powershell and batch file to display system information through browser.
Pre-requisites:
You need to place batch and powershell scripts on the
designated path (Mentioned in ServiceScheduler.cs file) to make this example
work properly. You can find the required files under Artifacts title in this
blog.
STEP 1:
Open Visual Studio and from menu open New Project à select the below
project and rename it to DemoWindowService.

STEP 2:
Once you click on OK, you will see the below screen and you
should rename file Service1.cs to ServiceScheduler.cs.

STEP 3:
Then click “click here to switch to code view” and it will
open the below screen with ‘OnStart()’ and ‘OnStop()’ methods. The ‘OnStart()’
triggers when the Windows Service starts and the ‘OnStop()’ triggers when the
service stops.

STEP 4:
Right-click the DemoWindowService project, add a new class
and name it "ServiceLibrary.cs".

After adding a class, make the following changes in the
class:
·
Make the class ‘Public’.
·
Declare it as a Static class.
·
Add log methods in the class.

STEP 5:
Open the ServiceScheduler.cs file and write the ‘OnStart()’
and ‘OnStop()’ code under respective methods. Refer below snippet for the same:
OnStart():

OnStop():

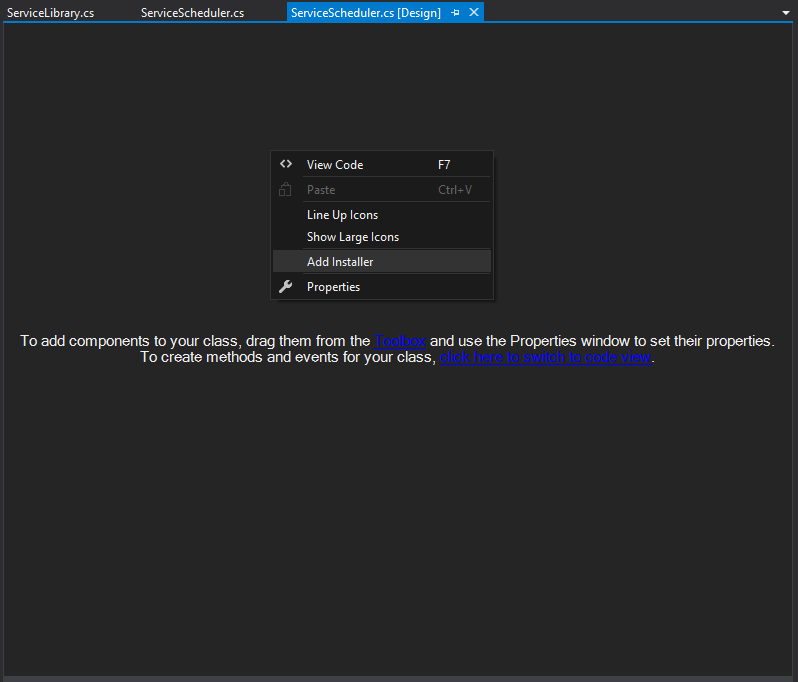
Once done writing the code, we need to add installer. To do
that return to Design mode of ServiceScheduler.cs and click on ‘Add Installer’.
Then you can see that one new file created named as
‘ProjectInstaller.cs’.


Inside ‘ProjectInstaller.cs’ file, Right Click on
serviceInstaller1 and click on properties:

Apply the changes as per mentioned in below snippets:
Change the ServiceName to "Demo Windows Service"
(or your own name) and StartType to "Manual" (or you can choose
"Automatic" if you need this service to be automatic).

Right-click the serviceProcessInstaller1, go to the
properties window and change "Account" to "LocalSystem":

STEP 6:
Build the project to generate .exe file where the project is
created.
This is the last step, now we need to install the .exe file
generated to our system.
Installing the Windows Service
STEP 1:
Open the command prompt and navigate to the path of .exe file
present which is generated in previous steps.
STEP 2:
Type command InstallUtil.exe “DemoWindowService.exe” and
execute. You must see the below yellow underlined result to be sure that
windows service is installed successfully.

Once installed we must start the Windows Service manually by
visiting the "Services and Applications" window in the computer.

STEP 3:
After the service is started. Please browse the link http://localhost:1000/ on your browser to view the system
information.
ARTIFACTS:
Click Here to download the artifacts.


Comments
Post a Comment